Sunday, July 25, 2010

Windows and siding

We have been putting in windows (most went in in June, but 3 had to be reordered, as the plans and the framing and the order didn't all agree; we're still waiting on a tempered glass window by the front door that has been wrong twice. Tempered glass is stronger so bad guys can't break the window, reach in and open the door). We hired the framers (Dean and his helper Ryan) to put the windows in: they work fast and do good work, and James especially wanted someone else to do the upstairs windows since he doesn't like heights. The windows in the first picture are the home office and master bedroom; they face south, and are at least 15 feet up in the air, as this is the downhill end of the house that sits above 12 feet of foundation. This is the only part of the house that does not have a porch or deck; it's a LONG way down from those windows, we had to rent extra-long ladders to do that stretch.
Picture #2 is Patrick being put to work. The siding is Certain-Teed (off brand of Hardy Plank, made of cement, and comes preprimed on the outside). For the south-facing wall of the house, which gets the worst weather exposure and is the only side of the house without a porch to protect it, we primed the back of the siding as well as the side that faces out. Patrick managed to not get the primer paint on his clothes! (Can't say that about Boy Scout camp, when he came home with green paint on his scout pants..)
Patrick has spent most of his summer vacation working on the house with James - doing lots of site cleanup, and helping build the deck (that'll be another post). The two of them have loaded up several trailers full of debris to go to the dump. Patrick gets a break from construction during Boy Scout National Jamboree in late July (he left on July 21st, on a plane full of 120 scouts)


Picture #3 shows siding on the upstairs gable, done by the framers (remember James doesn't like heights...) and picture #4 shows them working on the front of the garage. By now all the upstairs siding is on, and the downstairs siding should get finished this week.


Sunday, June 27, 2010

Roofing

The roof went on in just 1 week! Last week they delivered crates and crates of metal for the roofing. This is a standing seam metal roof (careful to leave flat valleys in the corners of the gables so that sliding snow doesn't take out the standing metal!), metal being a great nonflammable choice for a house in the woods. (James was lobbying for red but I though it would look like Pizza Hut. We went with dark green)
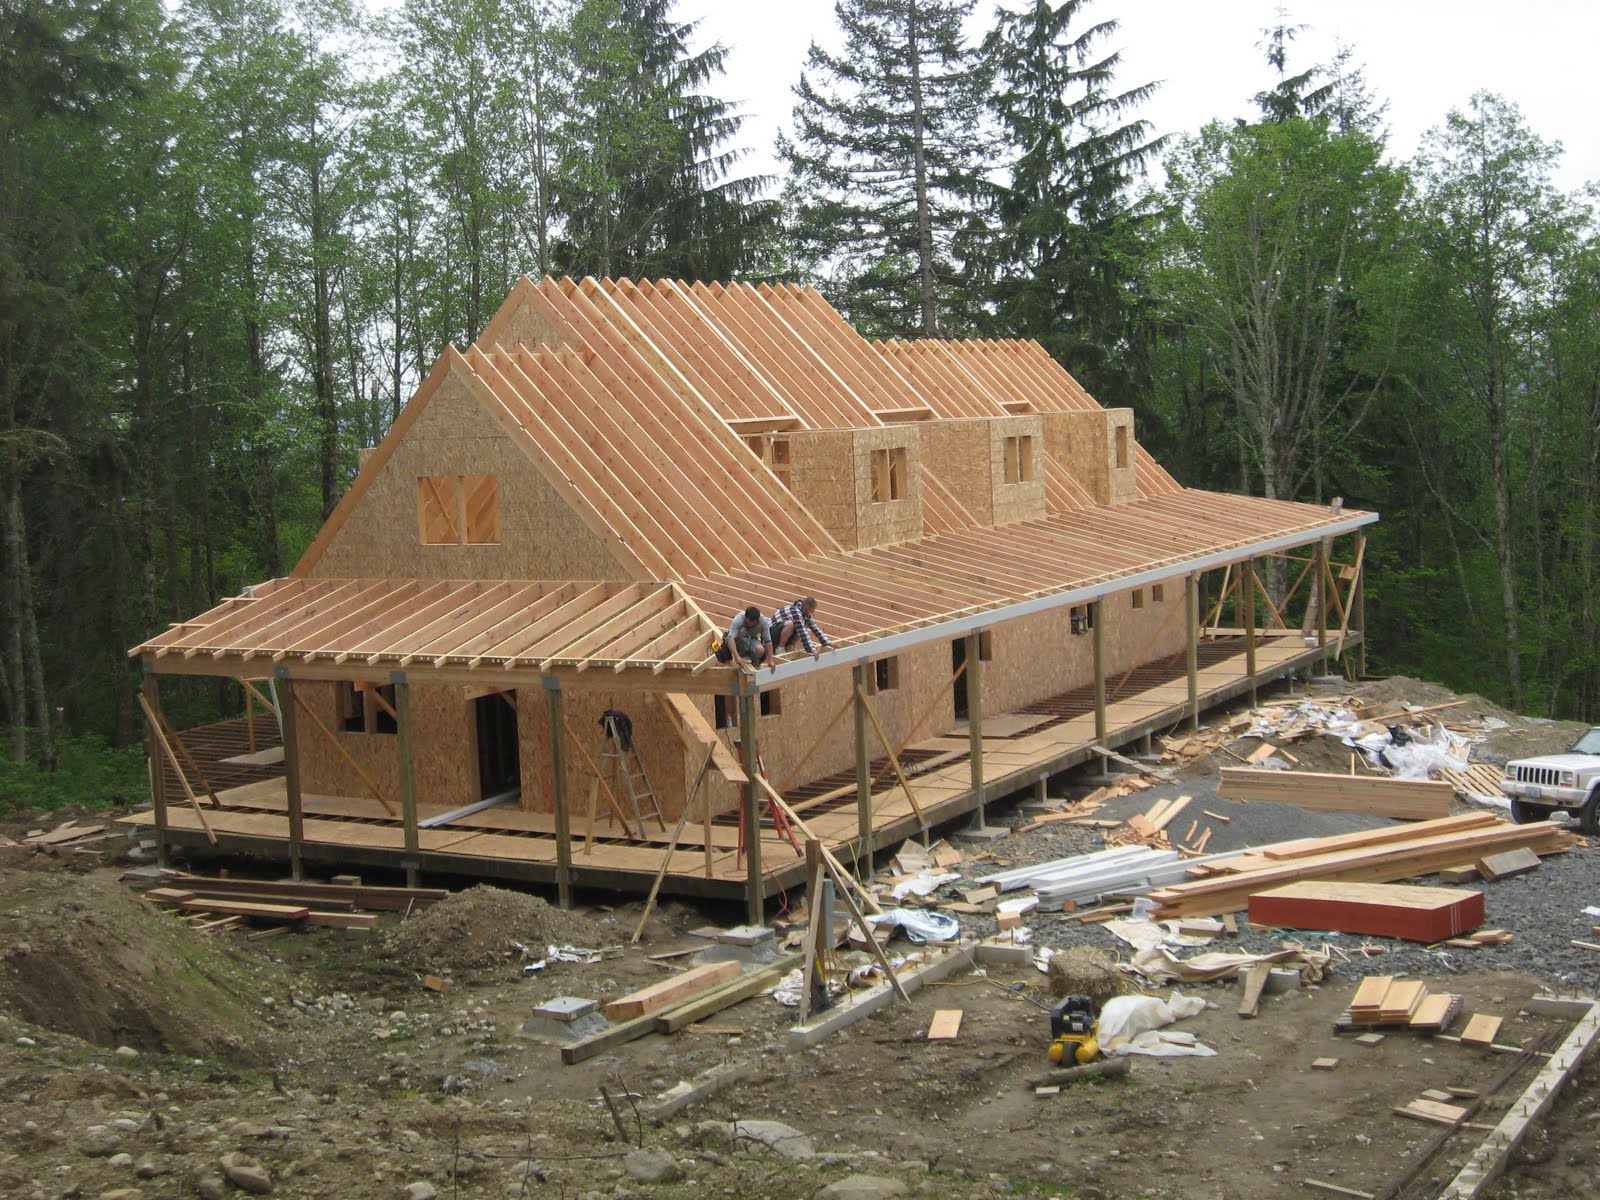
They started working on the dormers, then the porch roof (which is a mild 3/12 pitch), then the garage (which has no dormers at all), then finished the main house. The pitch on the roof is 12/12, to look like an old style farm house. We have a bid for gutters which will go in soon.
The last 2 photos show what it looks like now as you come up the driveway, and looking downhill from behind the garage.


Finished Framing!


It finally looks like a house! We're looking at the front door and front porch, with the roof sheathed and ready to put the roof on. It'll be nice to seal up the house; it has been so wet this spring that the main floor of the house has mold growing on it (on the OSB) from being exposed to so much wet and rain.


The garage was dubbed "Flying Nun's Hat" by Dean the framer. It has 2 bays, and the carport on either side will cover trailers etc; it's supposed to look like a simple barn.


I threw in some people pictures. First is one of James (on the right) with Dean Plummer the framer (center), and Dan Rayburn who is our building consultant from UBuildIt, doing one of his site visits. Dan is important to us to keep us from making stupid mistakes!

There's a picture of Patrick, rolling some primer on the back of the siding before it goes on. We are siding the house with cement siding (like Hardy Plank, but this is a different brand). The house will be less of a fire hazard if it's covered in nonflamable siding (both hazard from forest fires burning us down, or a house fire igniting the forest around us).

The last picture is Katie and I (Becky), standing on a small island surrounded by the everpresent puddles. Patrick climbed up the hill behind the garage to take that one.

Saturday, June 26, 2010

Masonry Heater


One of the features of the house we are very excited about is the masonry heater. This is a fireplace with a large amount of stone surrounding it, which releases heat back to the home for hours after the fire is burnt. We designed the center of the house to have this fireplace central between the kitchen and dining room and living room and foyer, really as a central feature of the house. Here are some photos of the construction of the fireplace.


Here is Stan and his crew building the innards of the masonry heater. The inner layers are standard firebricks, the outer layer will be veneer rock that we got on an awesome sale!!
The principle of masonry heathers (also called Russian heater, best known company who makes them is probably Tulikivi; ours was custom made and designed) is that they burn a very hot fire, and the smoke and heat is directed through lengthy channels in the brick so that essentially all the heat is absorbed into the mass of the stone, to radiate back into the room for hours (one arm-load of wood, burned in a 30-minute quick burn, can provide enough heat to radiate for 12-24 hours). It is a very clean burn, with almost no ash left (because of the high heat). And since we are sitting in the middle of 20 acres of sustainable forest, our fuel source is literally right out our front door. It provides a very comfortable heat, similar to radiant heating in the floor, except this is in the center of the house.


Framing the garage

Finally, the house is framed, and it's time to frame the garage. The weather did not cooperate, we have had a long stretch of WET weather. I got a panic phone call one weekend because one of the framers didn't have a raincoat, so I brought up a poncho from a Florida trip, and we set up a bonfire to keep everyone warm...


The framers did a wonderful job on the garage, but had to wade through 3 inch deep mud to do it. I have pictures of them standing in ankle-deep water.


Here is a photo of the house, framed and ready for the roof, the view from uphill from the house.


And this is the view as we drive up the road to the house.


Sunday, June 13, 2010

Sheathing the roof

These are photos from the 3rd week of May, when the framers were putting up the rafters for the roof (as opposed to trusses, which provide lots of support but don't leave room to move around in the attic). Luke and Ryan are perched on the corner of the porch roof adding fascia board. They really can't be afraid of heights to do that job.
On a side note, you can see the soffit vents in these pictures (2 foot lenght of wood with 3 holes covered with screen, for ventilation under the eaves of the roof). To save some money, James cut them all and made them at home. (We had mounds of sawdust after that project!)


The roof over the living space is a 12-12 pitch roof (in other words a 45 degree angle), and the porch roof is 3-12.


Since we are acting as out own general contractor, one of our tasks is job-site cleanup. We spent a Saturday in May doing that (the whole family, including Keeper the dog, leaving Tobi dog, the 13 year old, at home). We loaded up 2 trailer loads of scrap OSB board and assorted trash bags of plastic, wrapping, wire, and empty soda bottles, for a grand total of 2010 pounds of trash. We're told that is quite low for a house this size, largely because most of the walls are straight without a lot of cutouts and inserts.


By the week before Memorial Day this is what the house looked like: the roof at least is covered by wood (actually OSB), most of the rafters and trusses over the dormer windows are up, and the porch roof is covered. This shot is taken uphill from where the garage will be (the garage footings are in the foreground, that's the next step for the framers)

Friday, May 28, 2010

Porch and Deck

One of the features of this house we are very excited about is a wrap-around porch on 3 sides of the house. In this rainy climate in the Pacific NW, having a roof over an outdoor space allows us to use it for much of the year (and without the roof we'd get very wet). The framers have been working on the porch this month. The first photo is looking at the front entrance of the house; the wheelbarrow is sitting directly in front of the front door; you can see the posts on the right ready to hold up the roof over the porch.


In the second photo, I'm standing at the SE corner of the house looking across to the open deck on the south side, where the wrap-around porch transitions to the open uncovered deck, which allows the sun access to the south side of the house for passive solar warming.We have a "solar eave" on the south side of the house, which sticks out about 3' above the first floor windows, far enough to block the sun's rays in the summer from shining into the house, but in the winter when the sun angle is low, it allows the low-angle sun to reach the house and warm the rooms.


The next photo is Dean the framer working on starting the roof over the porch over the front door. Note the boom box sitting on the window sill on the right. I think they use as much electricity for the radio as they do for the power tools!

The 4th photo is Luke and Ryan on the second floor, above the front door. The spot they are standing will be the upstairs loft by the kids' rooms. This was taken on one of the only sunny days this month (note shirts off and sunglasses). Most of May has been below 60 degrees. We were blessed with a mild winter, but have had to suffer a very wet spring, and the builders are bearing the brunt of the weather.